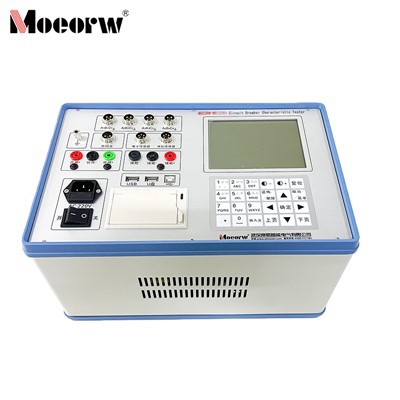
Measuring the insulation resistance of a motor is a critical maintenance task for ensuring its reliable operation and safety. As a seasoned provider of Insulation Resistance Testers, I’ve witnessed firsthand the importance of this process in various industrial and commercial settings. In this blog, I’ll share comprehensive insights on how to measure the insulation resistance of a motor using an Insulation Resistance Tester, equipment selection, test procedures, result interpretation, and safety considerations. Insulation Resistance Tester
Understanding the Basics of Insulation Resistance
Before diving into the measurement process, it’s essential to understand what insulation resistance is and why it matters. Insulation in a motor serves to protect the electrical conductors from coming into contact with each other or the motor’s frame. Over time, factors such as heat, moisture, vibration, and contamination can degrade the insulation, increasing the risk of electrical shorts, leakage currents, and even motor failure.
Insulation resistance is a measure of the electrical resistance of the insulation material between the motor’s windings and its frame. A high insulation resistance indicates healthy insulation, while a low value may suggest insulation degradation or damage. Regularly measuring the insulation resistance of a motor can help detect potential issues early on, allowing for timely maintenance and preventing costly breakdowns.
Selecting the Right Insulation Resistance Tester
Choosing the appropriate Insulation Resistance Tester is crucial for obtaining accurate and reliable measurements. Here are some key factors to consider when selecting a tester:
- Voltage Rating: The tester should have a voltage rating suitable for the motor being tested. Higher-voltage motors typically require testers with higher voltage output to provide a more accurate assessment of insulation integrity.
- Measurement Range: Ensure that the tester’s measurement range covers the expected insulation resistance values of the motor. Most motors have insulation resistance values in the range of megaohms (MΩ), so a tester with a wide measurement range is recommended.
- Accuracy and Resolution: Look for a tester with high accuracy and resolution to ensure precise measurements. A tester with a resolution of at least 0.1 MΩ is typically sufficient for most applications.
- Features and Functionality: Consider additional features such as auto-ranging, data storage, and display options. These features can make the measurement process more convenient and efficient.
- Safety Certification: Ensure that the tester is certified to meet relevant safety standards, such as IEC 61010. This ensures safe operation and compliance with industry regulations.
Preparing for the Measurement
Before measuring the insulation resistance of a motor, it’s important to take several precautions to ensure accurate results and personal safety:
- Isolate the Motor: Before starting the measurement, make sure the motor is completely disconnected from the power source. This helps prevent electrical shock and damage to the tester.
- Allow the Motor to Cool: If the motor has been running recently, allow it to cool down to room temperature before taking measurements. High temperatures can affect the insulation resistance values and lead to inaccurate readings.
- Clean the Motor: Remove any dirt, dust, or debris from the motor’s terminals and windings. Contamination can cause leakage paths and affect the accuracy of the measurements.
- Check the Tester: Ensure that the Insulation Resistance Tester is in good working condition and properly calibrated. Check the battery level or power supply and verify that all leads and probes are intact.
Step-by-Step Measurement Process
Once you have selected the appropriate tester and prepared the motor for testing, you can proceed with the insulation resistance measurement. Here is a step-by-step guide:
- Connect the Tester: Connect the tester’s leads to the motor’s terminals and frame. The red lead is typically connected to the motor winding, and the black lead is connected to the motor frame or ground. Make sure the connections are secure and free of any loose wires or debris.
- Select the Test Voltage: Set the tester to the appropriate test voltage based on the motor’s rated voltage. Refer to the tester’s user manual or consult an expert for guidance on selecting the correct test voltage.
- Initiate the Measurement: Press the "Test" button on the tester to initiate the insulation resistance measurement. The tester will apply the selected test voltage to the motor and measure the resulting current flow. The insulation resistance value will be displayed on the tester’s screen.
- Record the Measurement: Record the insulation resistance value and the test voltage used. It’s also a good idea to record the date, time, and any other relevant information about the motor and the test conditions.
- Repeat the Measurement: Repeat the measurement process at least three times to ensure consistency and accuracy. Take the average of the three measurements to obtain the final insulation resistance value.
- Interpret the Results: Compare the measured insulation resistance value to the manufacturer’s specifications or industry standards. A high insulation resistance value indicates healthy insulation, while a low value may suggest insulation degradation or damage.
Interpreting the Results
Interpreting the insulation resistance measurement results requires a good understanding of the motor’s specifications and operating conditions. Here are some general guidelines for interpreting the results:
- Acceptable Range: The acceptable range of insulation resistance values varies depending on the motor’s size, type, and application. Typically, a healthy motor should have an insulation resistance value of at least 1 MΩ. However, some motors may require higher insulation resistance values, especially in critical applications or in environments with high humidity or contamination.
- Trend Analysis: Monitoring the insulation resistance values over time can provide valuable insights into the motor’s insulation condition. A gradual decrease in insulation resistance values may indicate insulation degradation, while a sudden drop may suggest a more serious problem, such as a short circuit or a damaged winding.
- Comparison with Previous Results: Comparing the current insulation resistance values with previous measurements can help identify any changes or trends in the motor’s insulation condition. If the insulation resistance values have decreased significantly, further investigation is recommended to determine the cause of the problem.
- Manufacturer’s Recommendations: Always refer to the motor manufacturer’s recommendations and specifications when interpreting the insulation resistance measurement results. The manufacturer may provide specific guidelines or thresholds for acceptable insulation resistance values based on the motor’s design and application.
Safety Considerations
When measuring the insulation resistance of a motor, it’s important to follow all safety precautions to prevent electrical shock and other hazards. Here are some key safety considerations:
- Wear Appropriate Personal Protective Equipment (PPE): Wear insulated gloves, safety glasses, and other appropriate PPE to protect yourself from electrical shock and other hazards.
- Use the Tester Properly: Follow the tester’s user manual and operating instructions carefully. Do not touch the leads or probes while the tester is in operation.
- Avoid Wet or Damp Conditions: Do not perform insulation resistance measurements in wet or damp conditions, as this can increase the risk of electrical shock.
- Keep the Work Area Clear: Keep the work area clear of any obstacles or hazards. Ensure that the motor and the tester are properly grounded to prevent electrical shock.
- Disconnect the Tester: After completing the measurement, disconnect the tester from the motor and turn it off. Store the tester in a safe and dry place.
Conclusion
Measuring the insulation resistance of a motor using an Insulation Resistance Tester is a crucial maintenance task that can help ensure the reliable operation and safety of the motor. By following the guidelines outlined in this blog, you can select the right tester, prepare for the measurement, perform the test accurately, interpret the results, and take appropriate actions based on the findings.
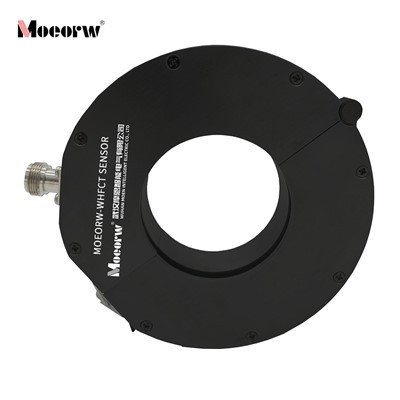
As a leading provider of Insulation Resistance Testers, we offer a wide range of high-quality testers designed to meet the needs of various industries and applications. Our testers are easy to use, accurate, and reliable, and they come with a comprehensive warranty and excellent customer support.
Online Monitoring Testing Equipment If you’re interested in learning more about our Insulation Resistance Testers or have any questions about measuring the insulation resistance of a motor, please don’t hesitate to contact us. Our team of experts will be happy to assist you and provide you with the information and support you need. We look forward to helping you ensure the safety and reliability of your motors.
References
- Electrical Safety Standards – IEC 61010
- Motor Maintenance and Troubleshooting Guides
- Insulation Resistance Tester Manufacturer’s Manuals
Wuhan Moen Intelligent Electric Co., Ltd.
As one of the most professional insulation resistance tester manufacturers in China, we’re featured by quality products and good price. Please rest assured to buy high quality insulation resistance tester in stock here and get quotation from our factory. Customized orders are welcome.
Address: Building A, No.1, Fenghuangyuan 2nd Road, Donghu New Technology Development Zone, Wuhan, Hubei, China
E-mail: info@hvhipotsystem.com
WebSite: https://www.hvhipotsystem.com/
