Hey there, I’m Jake, and if you’re reading this, chances are you’re either staring down a wonky hot pressing machine that’s been bugging you for weeks, or you’re a new shop owner who just unboxed their first unit and has zero clue how to tweak that pressing stroke. Full transparency— I’ve been selling hot pressing machines for 7 years, and I still get at least 3 DMs a week from guys panicking about adjusting that stroke. It’s not rocket science, but if you skip a few basic checks, you’ll either press something that’s underdone or cram so hard you warp your mold, and trust me, warping a $2k aluminum mold is not a flex. Hot Pressing Machine
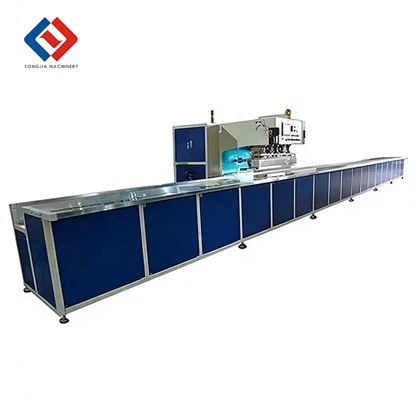
First off, let’s cut the jargon: the pressing stroke is literally how far the platen (the flat metal plate that does the pressing) moves down. If it’s too short, your material won’t get full contact— think of pressing a custom guitar pick blank and half the surface is still squishy. Too long, and you’re overcompressing, which ruins heat distribution, burns edges, or even blows seals in the hydraulic system. I see this all the time: new operators just crank the adjustment knob until they “feel pressure” and call it a day, but that’s the lazy way, and it’ll cost you more downtime than anything.
Before you even touch a single dial or screw, you gotta do the pre-checks I always walk every new customer through. This isn’t optional— skip this and you’ll be back here next week crying about a botched batch. First, power off the machine and unplug it. I don’t care how quick you think the adjustment is, there’s no such thing as “too safe” around hydraulic and hot metal parts. Second, make sure the platens are totally clean. Even a tiny scrap of leftover wood resin, epoxy, or metal shavings will throw your stroke off by a millimeter, which sounds small but is huge for precision work. Wipe ’em down with a lint-free cloth and isopropyl alcohol— no paper towels, they leave fuzz. Third, check your mold or die setup. If you’re pressing 1/4-inch composite boards, your stroke is way different than if you’re pressing 2-inch thick rubber gaskets. Don’t just go by the machine’s default; measure the total thickness of your material plus any release film or spacers you’re using (wait, spacers! If you use them, add that thickness too— I can’t tell you how many guys forget spacers and mess up the measurement).
Okay, now we’re ready to adjust. Most of the hot pressing machines I sell (standard units for woodworking, composites, and rubber) use either manual adjustable stop bolts, hydraulic stroke limiters, or digital display setups. I’ll break down each because that’s the most common setups— no need to overcomplicate it.
Starting with the most popular: manual stop bolt units. These are the old reliable, still used in 60% of small shops because they’re cheap and tough. You’ll see two bolts, one on each side of the platen assembly, right near the hydraulic cylinder. These are what stop the platen from moving too far down. Here’s how to tweak them step by step. First, loosen the lock nuts on both bolts with a wrench— important to do both sides evenly, not just one. If you crank one side more than the other, your platen will tilt, and you’ll get uneven pressure on your part. Next, use a long Allen wrench or a flathead screwdriver to turn the bolts. Turning them clockwise shortens the stroke (they stick out less, so the platen stops higher up), counterclockwise lengthens it. Test with a scrap piece first! Grab a scrap of your actual work material, set it between the platens, then slowly power on the machine (make sure it’s on “manual cycle” not auto for this test) and lower the platen until it just touches the material— wait, don’t push hard! Stop as soon as you feel the pressure, not when the cylinder’s screaming. Now, the distance between the platen and the top frame? No, wait, measure how much the platen moved. Wait, better way: after the platen is on the scrap, mark the position of the stop bolt relative to its mount. Then tighten the lock nuts back down— again, make sure both sides are tightened evenly, don’t over-tighten or you’ll strip the threads.
Next, hydraulic stroke limiters, which are a step up from manual bolts, common in mid-range industrial machines. These have a valve or a dial that controls how much hydraulic fluid flows to the cylinder, which sets the max stroke. The mistake here is messing with the pressure dial instead of the stroke limiter— pressure is for how hard you press, stroke is for how far. Don’t cross those wires! To adjust this, first, set the pressure to your recommended level (check your machine’s manual— most composite presses run 150-200 PSI, rubber is 250-300, don’t just guess). Then, go to the stroke limiter: it’s usually a round dial with numbers, maybe a knob that you turn to set the max extension. Slowly turn it in small increments— like 1/8 of a turn at a time— then test with a scrap. The good thing about these is most have a pressure gauge on the platen, so when you lower the platen, you’ll see when it reaches your target pressure, then stop. If it’s still moving past that (meaning too long), turn the limiter dial to a lower number. If it stops too early (too short), turn it up. Easy peasy, no wrench needed— that’s why a lot of guys like these, way less hassle than manual bolts.
Then we have digital setups, which are on the high-end machines I sell for large production shops. These are the ones with a screen that shows exact platen position in millimeters or inches, no guessing. The adjustment here is super straightforward, but even I’ve seen guys mess this up because they’re too used to manual units. Just pull up the stroke setting on the touchscreen, enter the exact number of millimeters you measured from your scrap setup, hit “set”, and you’re done. Wait, but a pro tip here: always do a physical test too. Digital screens can glitch, and sometimes the sensor is off by 0.5mm. Press a scrap, then measure its thickness with a caliper. If the digital setting said you pressed it to 0.25 inches, but your caliper says it’s 0.2, adjust the digital setting by 0.05 inches and retest. Don’t rely on the screen 100%— machines are only as good as the setup you put in.
Now, the part that’s actually important after you adjust: testing and fine-tuning. This is where 90% of my customers skip, and they end up with bad parts. You can’t just set the stroke once and call it a day. Every material is different: wood has expansion when heated, epoxy cures at different rates depending on temperature, rubber gets softer when warm. So after you do your initial adjustment, run 3-5 test cycles with actual production material, not scrap. Pull the parts out and measure their thickness, check for even pressure (look for smudges or uneven color on the material— that’s a dead giveaway if your stroke is off). If one edge is thinner than the other, your platen is tilted, which means you messed up the manual bolts (common on manual units) or the pressure on one side of the hydraulic cylinder is off (common on hydraulics). If the center is thinner, your stroke is too long, you’re overcompressing. If it’s too thick, stroke is too short.
Wait, also— common mistakes I see all the time that people don’t realize are stroke issues. Like, if you’re pressing veneer and you get air bubbles, that’s often stroke too short— you didn’t let the platen go far enough to squeeze out all the air. Or if your parts have a “crush zone” at the edges, that’s stroke too long— the platen is overpressing the edges. I had a customer last month who was blaming his mold for bad rubber gaskets, turns out he adjusted the stroke so the platen only moved an inch, but the gasket needed 1.5 inches to get full contact. That guy saved $500 on a new mold just by tweaking the stroke.
Another thing: maintenance checks. Every 500 hours of operation, go back and recheck your stroke. Hydraulic seals wear down over time, which makes the cylinder move differently, and the stop bolts can loosen even if you tightened them— vibration from the machine does that. I recommend logging your stroke settings in a little notebook or a spreadsheet. Write down what material you pressed, what stroke you used, how it turned out. That way, next time you run the same job, you don’t have to guess. Last year, I had a customer who ran the same 3/8-inch composite boards every week, and after logging settings for 6 months, he cut his setup time per batch from 20 minutes to 2 minutes. Game changer for production.
Wait, quick safety note: when you’re adjusting, never stay too close to the platen when powering on. Even if you think it’s locked, a loose bolt or a glitch can make it move unexpectedly. Keep your hands at least a foot away, and use the foot pedal if your machine has one, so you don’t have to lean over it. I’ve seen a guy get his hand pinched because he was trying to adjust a bolt while the platen was lowering— don’t be that guy.
Let me wrap this up with a quick recap, because I know you’re probably scrolling for actionable steps. 1) Unplug, clean platens, measure material + spacers. 2) Choose your setup (manual bolts, hydraulic limiter, digital) and adjust in small increments. 3) Test with scraps, then production parts. 4) Log settings and recheck every 500 hours. 5) Don’t mix up stroke and pressure— stroke is how far, pressure is how hard.
Blister Packaging Machine If you’re still stuck, or your machine is acting weird after adjusting, that’s what I’m here for. I sell all types of hot pressing machines, and I can walk you through step-by-step over a call, no robotic script, just real tips from someone who’s been fixing and selling these things for years. Don’t waste time guessing or breaking parts— hit us up to chat about your setup, what materials you’re pressing, and we’ll get your stroke dialed in so your batches run smooth.
References
- Hot Pressing Machine Operation & Maintenance Guide, Industry Press Association, 2022
- Hydraulic Press Stroke Adjustment Best Practices, Industrial Machinery Magazine, Vol. 18, No. 4, 2021
- Precision Composite Processing: Stroke Calibration for Hot Forming, Journal of Manufacturing Processes, 2020
Dongguan Yongjia Machinery Equipment Co., Ltd.
We are one of the most reliable hot pressing machine manufacturers and suppliers in China, specialized in providing high quality customized service. Please feel free to wholesale advanced hot pressing machine at low price from our factory. For quotation, contact us now.
Address: No. 240, Chashan South Road, Chashan Town, Dongguan City, Guangdong Province, China
E-mail: info@yjwelding.com
WebSite: https://www.yjhighfrequencymachine.com/
